In this article, I will explain the steps for configuring the Microsoft surface Hub for the video conferencing meeting room systems with Skype for business on-premise. Here, we will be using the on-premise Active Directory, Exchange and Skype for Business. Surface Hub requires an account in Active Directory, room mailbox in Exchange and the account enabled in Skype for Business.
The Surface Hub is a wall-mounted or roller-stand-mounted device with either a 55-inch or an 84-inch touchscreen with multi-touch and multi-pen capabilities, running the Windows 10 operating system. The devices are targeted for businesses to use while collaborating and videoconferencing. The Surface Hub runs Windows 10 Team, a customized version of Windows 10 Enterprise.
Skype for Business video conferencing will be included with the Surface Hub. Microsoft Office applications can also be used, including Word, PowerPoint and Excel. Microsoft OneNote allows users to draw on the screen.
Create the mailbox in Exchange server on premise and enable the account in Skype for Business on premise by using the below commands,
-
Exchange Powershell:
- New-mailbox -Name [email protected] -Password xxxxx -UserPrincipalName [email protected] -Room
- Set-CalendarProcessing -Identity [email protected] -AutomateProcessing AutoAccept -AddOrganizerToSubject $false –AllowConflicts $false –DeleteComments $false -DeleteSubject $false -RemovePrivateProperty $false -AddAdditionalResponse $true -AdditionalResponse “This is a Surface Hub room!”
- Set-Mailbox [email protected] -UseDatabaseRetentionDefaults $false -RetainDeletedItemsFor 1
-
Skype for Business:
- Enable-CsMeetingRoom -SipAddress “sip: [email protected]” -RegistrarPool skypefe.cloudexchangers.com -Identity “SurfaceHub”
-
Active directory:
- Manage the AD account and computer account of the SurfaceHub
- Create a security group for managing the surface hub’s – here, we will be using “SurfaceHubAdmins”
Note: Incase if there are restrictions in active sync mailbox policy, then convert the mailbox to type “Regular” and run the command, Set-CasMailbox and allow the ActiveSyncAllowedDeviceID. You can get the Active Sync device ID from the Surface Hub. Once done, convert it to back to the room mailbox. Surface hub will be using the active sync protocol to connect to the exchange mailbox.
Below are the steps involved in the configuration of the Surface Hub and during the setup:
- Hi There
- Network Set up
- Set up for you
- Device account (skipped during this flow of installation and done later)
- Name this device
- Set up admins for this device
- Device Account
- Password Rotation
- Update the Surface Hub
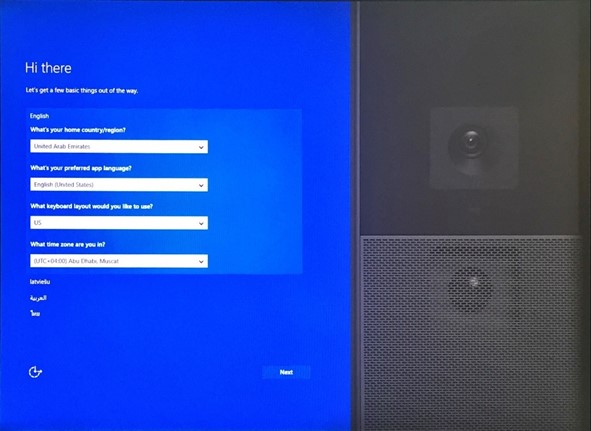
Hi There:
- This is the first screen that will be seen when the Surface Hub is powered on for the first time. It’s where the region / localization information for the device is put
- Select a language and the initial setup options are displayed

Details
If the default values shown are correct, click Next to continue else change as necessary the values in the appropriate boxes.
Region & Language Selection:
- Country/region: Select the country or region where the Surface Hub will be used.
- App language: Apps and features will display in this language and language format.
- Keyboard layout: Select the keyboard layout for the on-screen and physical keyboards that will be used with your device.
-
Time zone: Select the time zone where the Surface Hub will be used
Network Setup:
- Make sure the device is connected to an active network port
- Post which the Ethernet should populate with the domain name

If the device fails to detect a wired network, the below screen would appear.
- Select one of the wireless networks shown (if the network is secured and if it is as per company standards), it will then go to a login page. See Wireless network setup for details.
- Click Skip this step to skip connecting to a network and it will proceed to the next page which is the Set up for you page.
- You can plug in a network cable while this screen is visible. The device will detect it and will add Next to the screen. Click Next to continue with making the wired connection.
Set Up for You:
This screen is purely informational and shows which recommended settings have been enabled by default.

Details
Please read the information’s on the screen and note which services have been enabled by default. All of them can be changed using the Settings app if need be.
Device Account:
On this page, the Surface Hub will ask for credentials for the device account that has been previously configured. Provide the details of the account created earlier, [email protected] and the password.

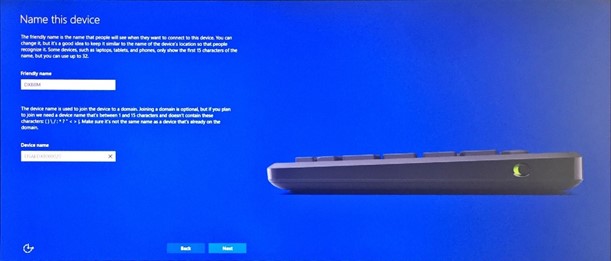
Name the Device:
There will be two unique names for the Surface HUB that will be used for identifying the Surface Hub.
- Friendly Name (The name that will be displayed on the HUB used for wireless casting)
-
Device Name (Defaults to the alias of the device account) – SurfaceHub – this will be name of the computer object which will be created in the Active Directory
Details
Enter the values as needed and then click Next to go continue with the next steps.
While either of the names can be changed later, keep in mind that:
- The friendly name should be recognizable and different so that people can distinguish one Surface Hub from another when trying to wirelessly connect.
- If the device is being added to the domain, the device name must not be the same as any other device on the account’s Active Directory domain. The device can’t join the domain if it is using the same name as another domain-joined device.
Setting Up Admins for The Device (joining of device to the domain & setting up of Admins):
As every Surface Hub can be used by any number of authenticated employees, settings are locked down so that they can’t change from session to session. Only admins can configure the settings on the device.
This page allows to choose from several options on how to set up admin accounts who can have the privilege to locally manage the device.

The purpose of this page is primarily to determine who can configure the device from the device’s UI; that is, who can actually visit a device, log in, open up the Settings app, and make changes to the Settings.
Details
Three available options are available, and we will use be using Active Directory Domain services
- Use Active Directory Domain Services
- Use Microsoft Azure Active Directory
- Use a local admin
Use Active Directory Domain Services
Click this option to join the device to AD. On selecting this and clicking Next, it will be taken to the Use Active Directory Domain Services page and asked to enter credentials that allows the HUB to be joined to the specified domain. After joining, a security group can be assigned from the joined domain, and users with the credentials from that security group will be able to use the Settings app.
Use Microsoft Azure Active Directory
Clicking this option allows you to join the device to Azure AD. On selecting this option and clicking Next, the device will restart to apply some settings, and then will be taken to the Use Microsoft Azure Active Directory page and asked to enter credentials that can allow the HUB to be joined to Azure AD. After joining, admins from the joined organization will be able to use the Settings app. The specific people that will be allowed depends on the Azure AD subscription and how the settings has been configured for the Azure AD organization.
Note:
- If the Surface Hub is joined to Azure AD during first-run setup, single sign-on (SSO) for Office apps will not work properly. Users will have to sign into each Office app individually.
Use a local admin
Choosing this option will allow to create a single local admin. This admin won’t be backed by any directory service, so we recommend to only choose this case if the device does not have access to Azure AD or AD. Once a local admin’s username and password is created, the same credentials will be needed to make any changes or go into the Settings app.
Note:
- A local admin will have access to the specific HUB only and not to the other HUB’s unless the credentials are same in all HUB’s.
- Once a local admin has been set up, to change the device’s admin the device would have to be resetted (formatted in lay man’s language).
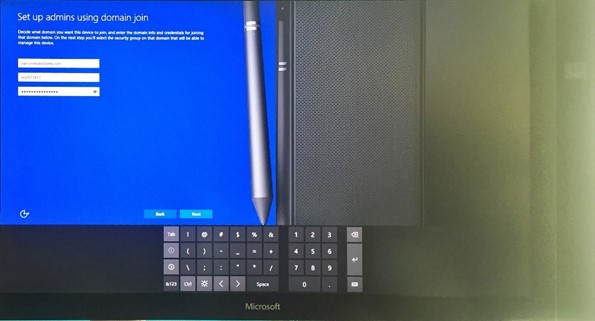
Use Active Directory Domain Services
- This page will ask for credentials to join a domain so that the Surface Hub can provision a security group as administrators of the device.
- Once the device has been domain joined, you must specify a security group from the domain you joined. This security group will be provisioned as administrators on the Surface Hub, and anyone from the security group can enter their domain credentials to access Settings.
Details:
The following input is required:
- Domain: This is the fully qualified domain name (FQDN) of the domain that the HUB is to be joined to. A security group from this domain can be used to manage the device.
- Username: The username of an account that has sufficient permission to join the HUB to the specified domain. This account must be a computer object.
- Password: The password for the account.
On Clicking next and after the credentials are verified it will proceed to the below screen where the security group needs to be chosen.

Select the Security group as applicable….please see the Note below: SurfaceHubAdmins
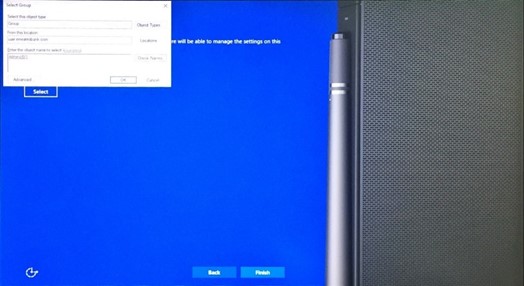
Click on finish to complete these steps. The HUB will restart and after few moments will come up to the Welcome Screen.

On completion of the above click on the Sync button and the HUB screen should return stating that the “Account is up to date”
Setting up Password Rotation:
Go back to the device account tab and look for the below radio button which would be set to “Off” by default on a new HUB.
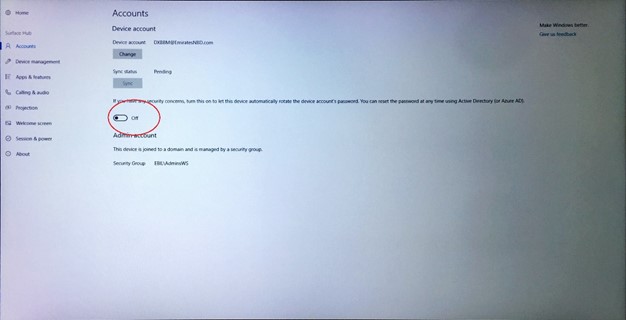
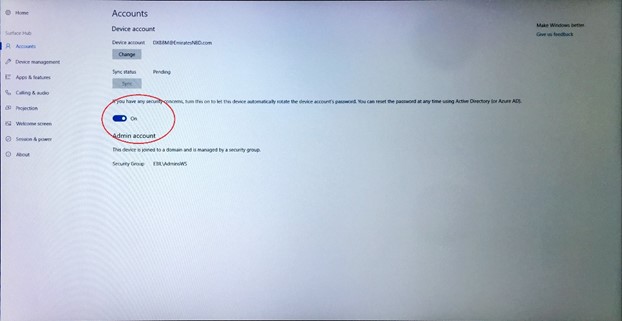
Toggle it to “on” as shown in the below screen shot to let device automatically rotate the device account’s password.
Note: Once this option is enabled the old Password will not work and to reset the password at any time it needs to be done from Active Directory (or Azure AD).
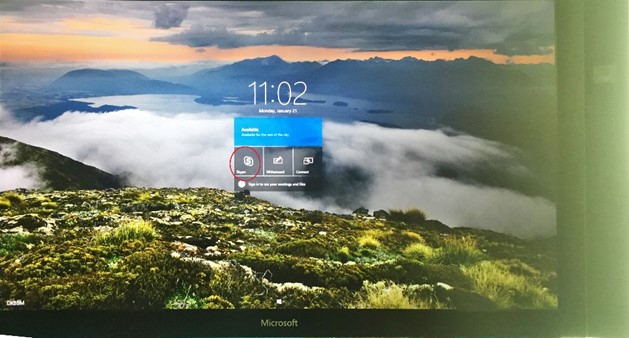
Restart the HUB once and upon restart the HUB will come back to the Welcome Screen.
Click on Skype as highlighted in red below.
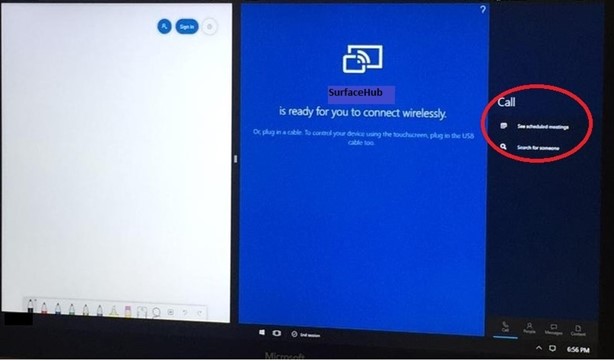
On clicking the Skype Button the below screen with the Call (as highlighted) should appear.
Which implies the HUB is joined to the Domain with the right account details and ready for Skype Calls.
Once the HUB has been verified by making some test calls, proceed with updating the HUB’s with the latest patches.
Updating the HUB with the latest patches:
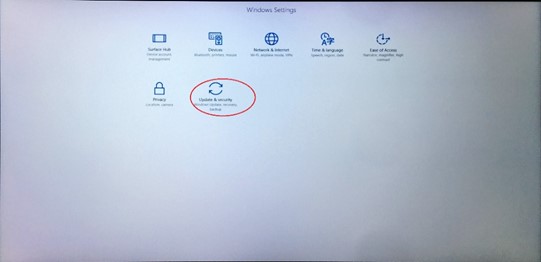
Log into the HUB by going to the settings tab as described above earlier and select Update & Security
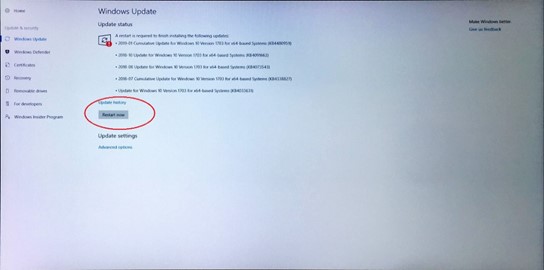
Select “Check for Updates” as highlighted below.
Note:
- Before doing this, please ensure the HUB is able to reach the Microsoft website from where it downloads the patches.
- Incase wireless is chosen to access the internet for updates, disconnect the Ethernet cable as the Ethernet will take priority over wireless.

On completion of the updates the HUB might ask for a restart. Click on the “Restart Now” button as highlighted below.
Once the HUB is restarted and it should be updated.
References:
https://docs.microsoft.com/en-us/surface-hub/on-premises-deployment-surface-hub-device-accounts
https://docs.microsoft.com/en-us/surface-hub/
Happy learning!! 🙂