Exchange migration is one of the most challenging tasks for administrators. We always look for something better to overcome challenges. technology is not worthy if there is no upgrade, when we refer as upgrade it is also part of Migration, because without migration upgrade to new technology is not possible.
Whenever I deal with clients the first thing we need to make them satisfy is about the migration plan & all we need is an expert to deal with.
There are lot of smart tools within the market which can simplify the migration but after lot of analyze and testing we found that LepideMigrator for Exchange (LME) is one of the best and not just migration it can do lot of things as I listed below, recently we have come across with the requirement to do large migration for complicated network infrastructure. We had to go through so many tools after we made our decision to simplify the migration tasks.
So after going through the review about this tool, I cannot stop me writing about the best thing about this tool, there are lot of good reasons behind for me to strongly recommend this product. Some are:
- Cost effective
- Pre-Migration analyzer
- Easy to use
- Seamless or less downtime
- Smarter interface
- Reports
- Multi Language Support.
LepideMigrator for Exchange can do smart & effective migration FROM or TO different source and target, with that said I can do:
- Exchange 2003 – Exchange 2013 Migration (without any intermediate migrations)
- Exchange (2003 – 2016) – Office365 Migration (Support all versions)
- Intra Forest & Cross Forest Migration
- Public Folder Migration
- Roll Back feature available
Based on our review I could say that LepideMigrator tool is taking the migration tasks to the next level & gives more confident to the administrators and gives one more good reason to smile when taking up migration challenge.
This tool has got very good interface which can make the task easier than ever,Installation and configuration is not that difficult, just simple next- next- finish process, there are few best things about LepideMigrator for Exchange (LME) are:
Pre-migration Analysis:
This is great feature which can do complete analyze such as item counts, public folder, mailboxes then provide the detailed reports on migration scenarios. I would say first phase of migration is now become simple using this feature.
Real time Reports:
Migration can never be completed without detailed reports, LepideMigrator can do that for you. It can also provide detailed real time reports about ongoing migration process. Web based console will provide the exact status with start & stop options, there are lot more available within reports.
Run Parallel Migration:
This used to be one of my dream in past when I used to do lot of migrations for my customer, now, this has become true. Using this feature, you can now map multiple source with target server & still gives the privilege to manage from single interface.
Less downtime:
Honestly, without this requirement no migration discussion starts. Now with this tool we can have clear answer on how best it can bring less downtime.
Things started moving to cloud & Office365 is a big part for messaging. Hence we might see the future migrating their messaging system to Office365. I have been doing lot of migrations for my clients from Exchange or other servers to Office365. Considering the importance of this migration here I am going to share how to achieve seamless and easy migration from Lepide tool.
How to migrate from Exchange 2003 to Office 365 using LepideMigrator for Exchange
Office 365 migrations are becoming increasingly common, but many organizations are hesitant about beginning the process. This is because the native migration methods can sometimes be difficult and prone to error. This review article provides you with the basic procedures for carrying out migrations from on-premise Exchange Server to Office 365 using LepideMigrator for Exchange.
In a lab setup, the source environment is Exchange Server 2003 and the destination environment is Office 365. The Exchange Server is usually installed on Windows Server 2012 R2. However, as LipideMigrator for Exchange is compatible with all versions of Windows Server and supports all versions of Exchange Server, it does not matter where your Exchange is installed or which version of Exchange you are using.
The migration process is simple and quick to complete. Below are the steps you need to follow:
Create the Mailbox and Public Folder migration jobs
After launching the application, the first thing you will have to do is select the source on-premise Exchange Server and provide admin credentials to access and select mailboxes in it. If there is more than one Exchange Server you will have to create separate jobs for each of them. Once the server is added, the application will show all the mailboxes within, select the mailboxes that you want to migrate. In the following image, the mailboxes to be migrated have been selected.
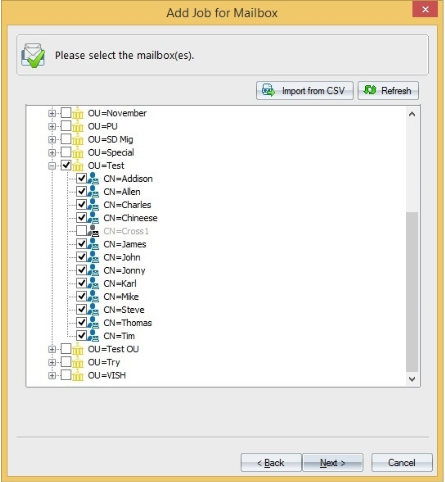
Figure 1: Select the mailboxes for migration
Now you will have to enter the details of the target Office 365 environment and the credentials of someone with a Global Administrator Role. This will enumerate all the mailboxes in target Office 365, and source and target mailboxes will be mapped automatically. To change the mapping, or if no match is found, you can change the mapping manually. The good thing about software is that you can decide at the granular level, which messages to migrate and which not. As long as the migration is not complete, the mailboxes can be kept in sync so that new messages received in the on-prem Exchange will be migrated to Office 365 automatically and vice-versa. In the following screen, source and target mailboxes have been mapped and the filters have been applied.
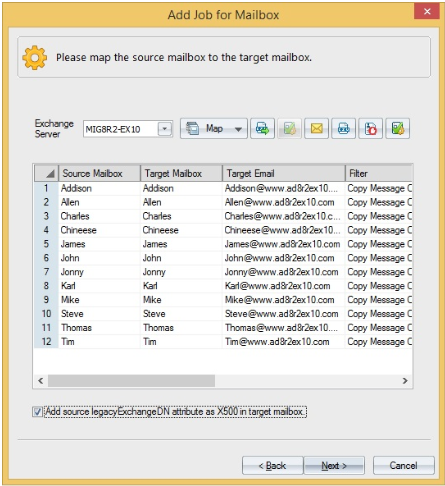
Figure 2: Mapped mailboxes with filters on
You will receive notifications when the job starts, stops or is completed. The migration job can be scheduled to run at non-office hours so that office workers don’t face network congestion. The total time of migration is dependent on your network bandwidth.
To migrate Public Folders, you will have to create a separate migration job. The steps are pretty much the same as in the case of mailbox migration job.
Run Outlook profile manager job to update Outlook profiles of the migrated mailboxes
After the Mailboxes and Public Folders have been migrated, you will have to create and run profile manager job to update profiles of the migrated mailboxes. You can also create new profiles. The below image shows entering Office 365 credentials to access the target mailboxes.
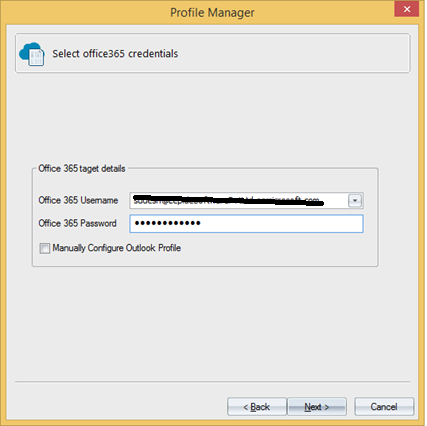
Figure 3: Entering Office 365 credentials
In the next step, the source and target mailboxes are automatically mapped. You are, however, given the option of changing this mapping. After you have finalized the mapping of the source and target mailboxes, just click Next to update the profiles of migrated mailboxes on Office 365. Mapping between source and target mailboxes is shown in the below image.
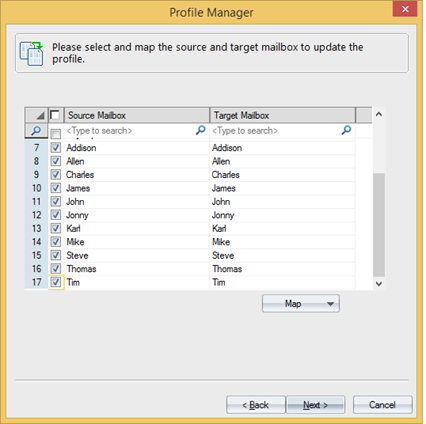
Figure 4: Mapping between source and target mailboxes
Run Outlook rule migration job to migrate Outlook rules from the source Exchange Server to Office 365
LepideMigrator for Exchange migrates Outlook rules from the source Exchange Server to Office 365. When migrating the Outlook rules, mailbox mappings are done as per the mailbox migration jobs, just as we did in the step 1. You can exclude a few mailboxes if you want to configure different rules for them, if not then simply leave the mappings as they are and proceed to the next step. As the job runs, software shows the status of Outlook rule migration and the total number of rules migrated for each mailbox. The below image shows the rule migration progress for the mapped mailboxes.
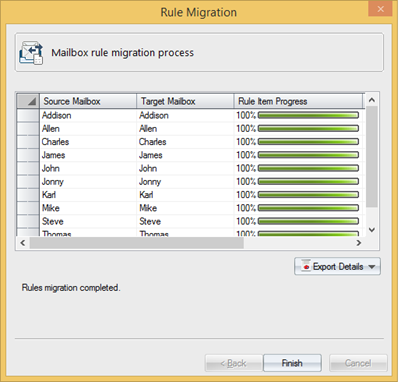
Figure 5: Outlook rule migration
In the below image you can see all the selected mailboxes of the Exchange Server 2003 (as shown in the figure 1) have been migrated to Office 365. User profiles and mailbox rules too have been migrated successfully.
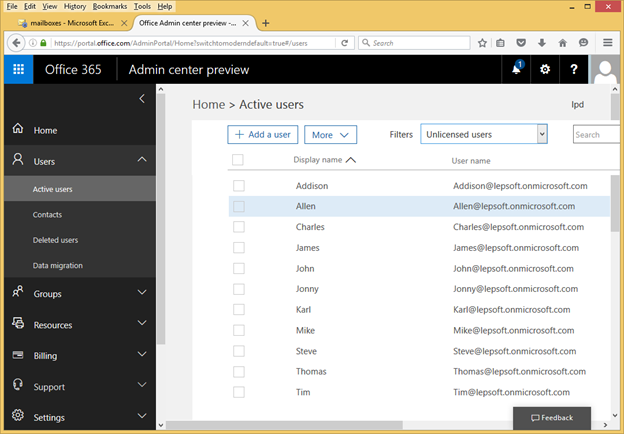
Figure 6: Mailboxes in Office 365 after migration
Conclusion:
With more and more organizations looking to migrate to Office 365, Lepide has designed LepideMigrator for Exchange to be an effective solution for carrying out the task quickly and easily. This article covers only a fraction of what the solution is capable of achieving and uses only one migration scenario. It allows you to perform any migration quickly without the threat of data loss or disruption to the end users.
To download free trail, Please click on LepideMigrator Download
For more information about their success stories and other products, Please refer to below links.
Please feel free to comment for questions or suggestions.